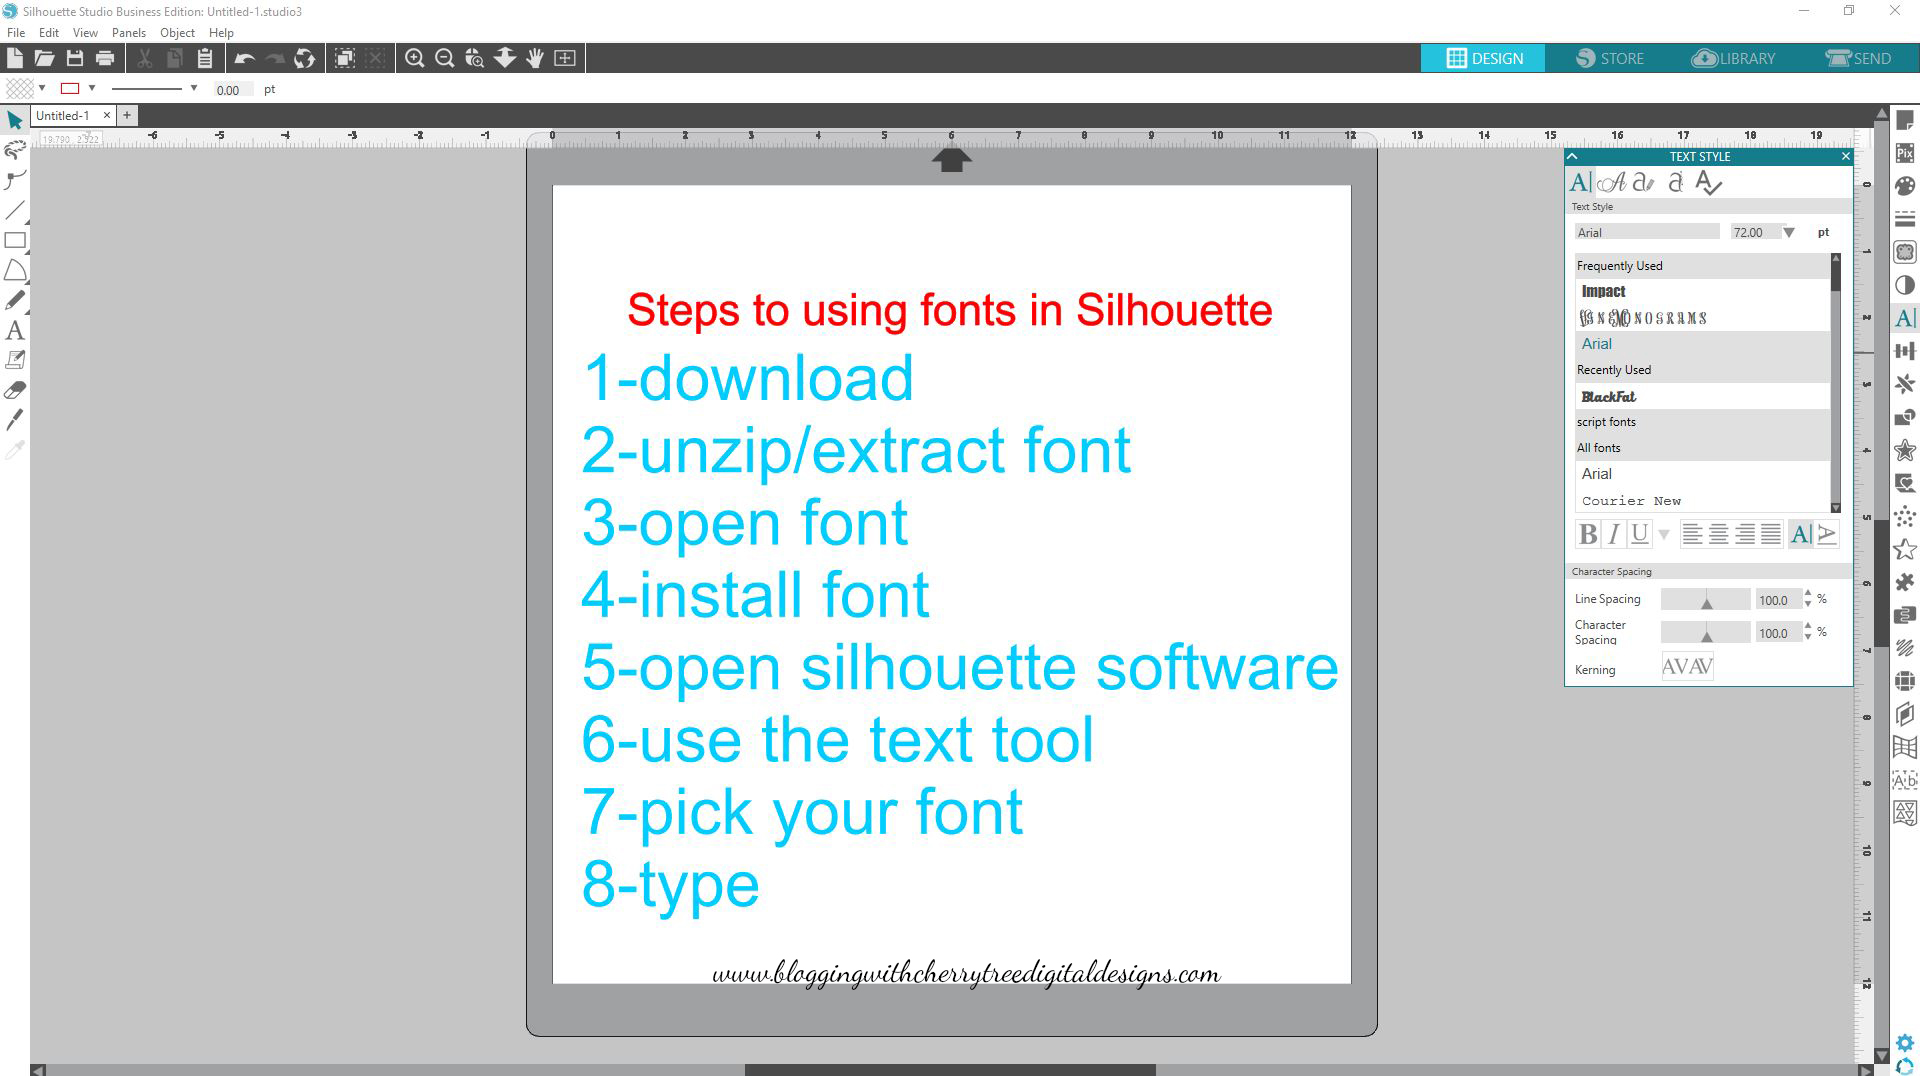
In this tutorial, we will make sure you understand how to download a font, install it on your computer, then use it in your Silhouette software. This post may contain affiliate links. These links support this blog but never costs you anything extra to purchase thru. By using these links this helps us keep all of our information free for your use!
Please visit our YouTube channel and subscribe to see all of our videos as they are added: YouTube
The first thing you want to do is turn off any and all software. This includes the Silhouette Studio. When installing or making any changes to your computer you will always want to make sure everything is closed. **Never never skip this step. All software reads your font folder on your computer at the time of opening it. Therefore it is necessary to have all software closed in order for your fonts to show up with your text tool. If for any reason you forget just close out your software and restart it. This will allow for a fresh read of your fonts to ensure everything installed is properly loaded.**
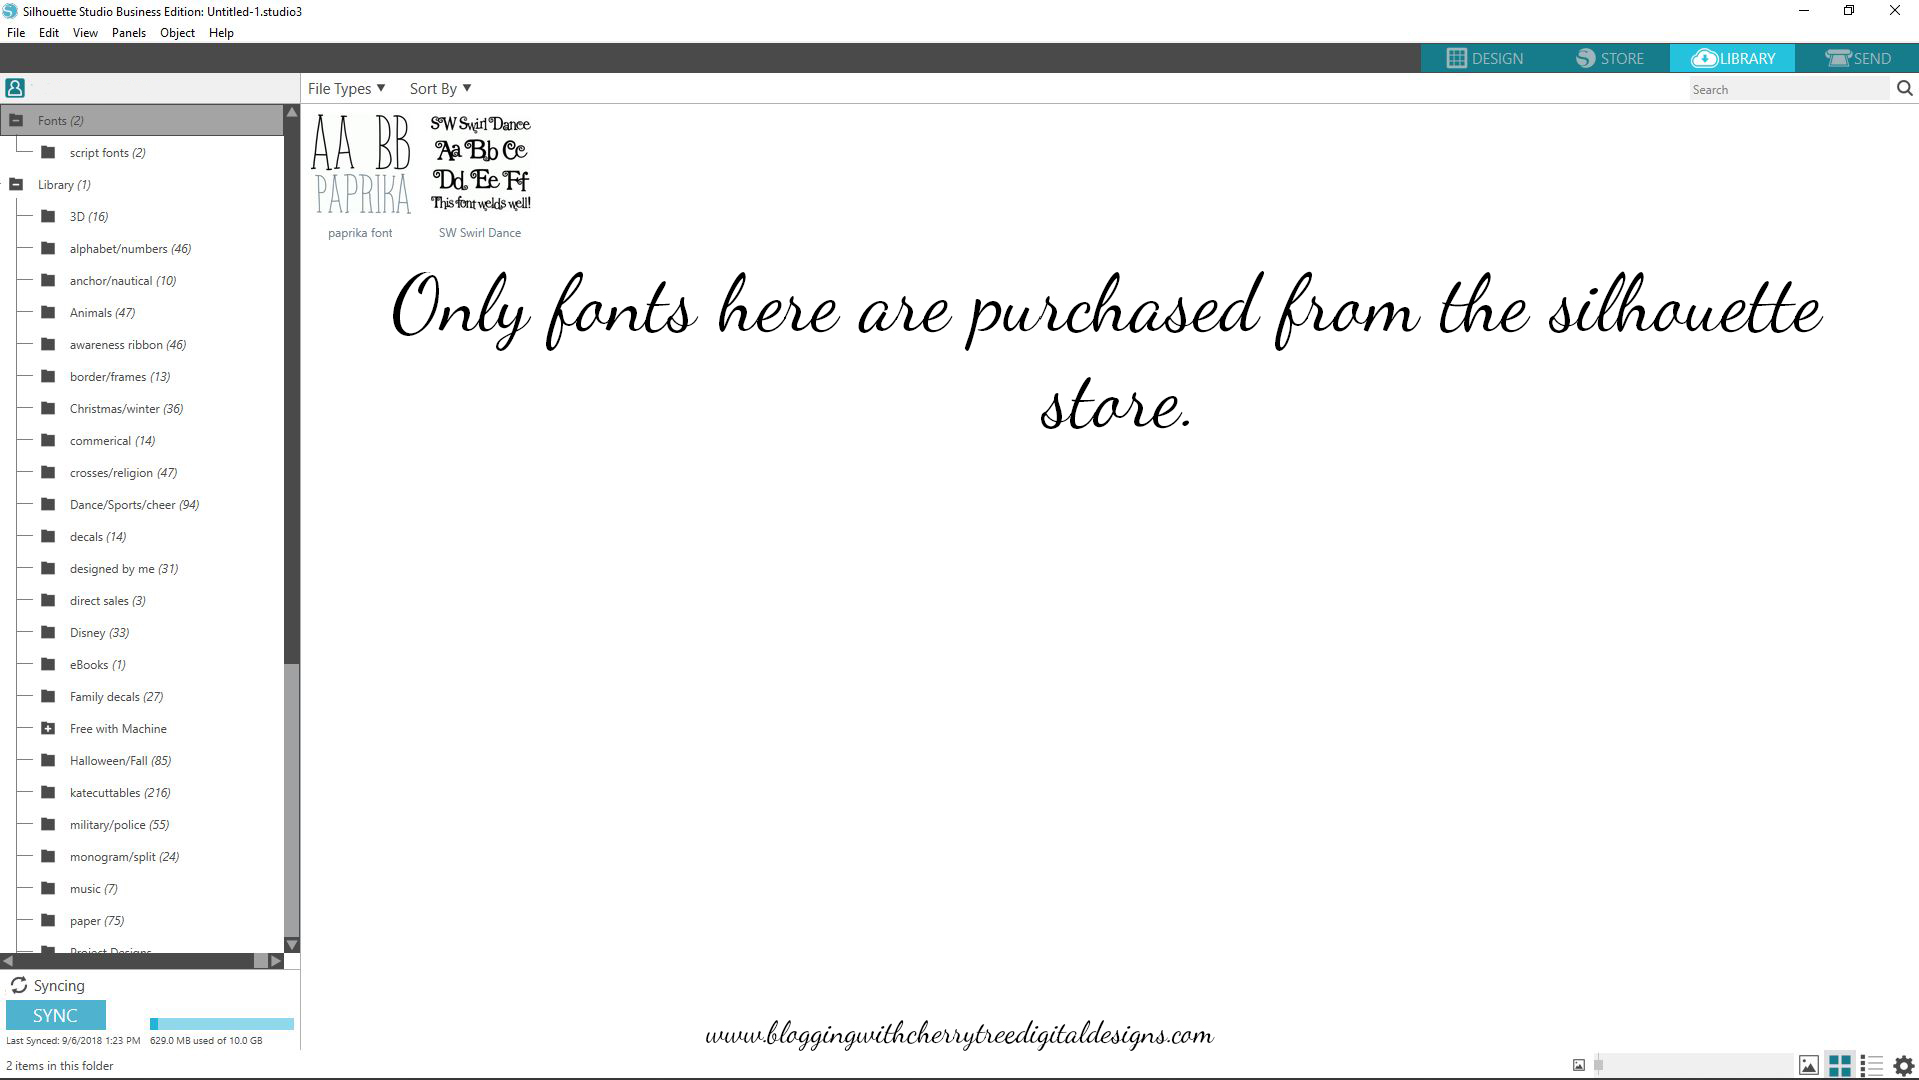
Please understand that at no time will your fonts show up in your silhouette library. The only fonts you will see here are fonts downloaded straight from the Silhouette store. They are installed and located in your text tool. The same as you would find with Microsoft word, excel, or any other program.
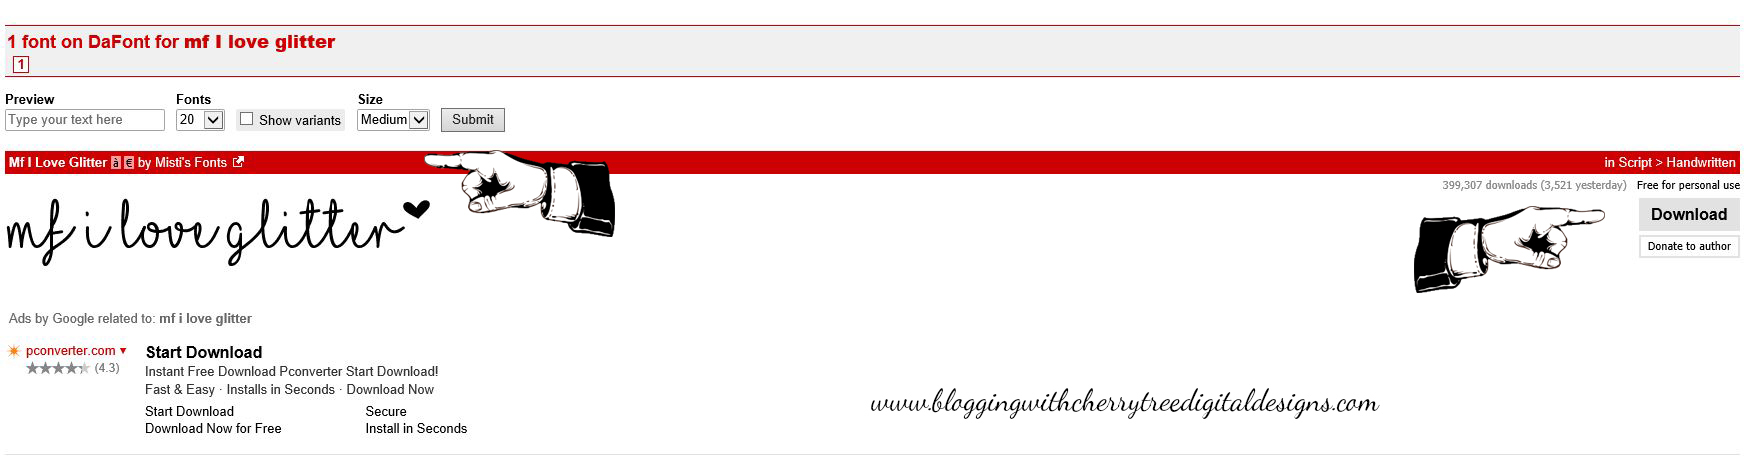
For this tutorial, we will be using dafont and the mf I love Glitter font located here: http://www.dafont.com/search.php?q=mf+I+love+glitter When shopping on dafont.com always make sure to take note of what the terms of use are. You will find personal use, 100% free, demo, and a few more options on their site. Above the demo of the font you will also be able to see and locate the designer and if they have a website to see other fonts, ask them specific questions or even purchase a commercial use license from them. For this specific font, you can donate to the author thru dafont or go to their page and purchase the licenses for commercial use for $8. If you plan on making any products to sell please support the artists that is making it possible for you to make a beautiful piece.
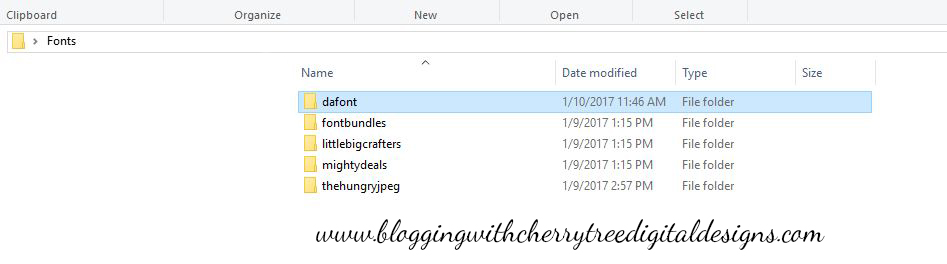
**Bonus information to help you keep your fonts organized and be able to know what you have commercial use or personal use rights to at a glance**
I set up a folder on my desktop and have listed the popular sites I download from. Inside those folders, I make a commercial use and personal use folders. When downloading I file these under the proper website name and whether I have gained commercial use rights or if I only have personal use. Most people do not intend on getting into business right away and 3 months down the road you have downloaded 1000 fonts, a neighbor loves your products and told their friends, and now you have a ton of orders. How in the world do you know what you can legally sell with? Start off on the right foot by keeping things organized and you are set!
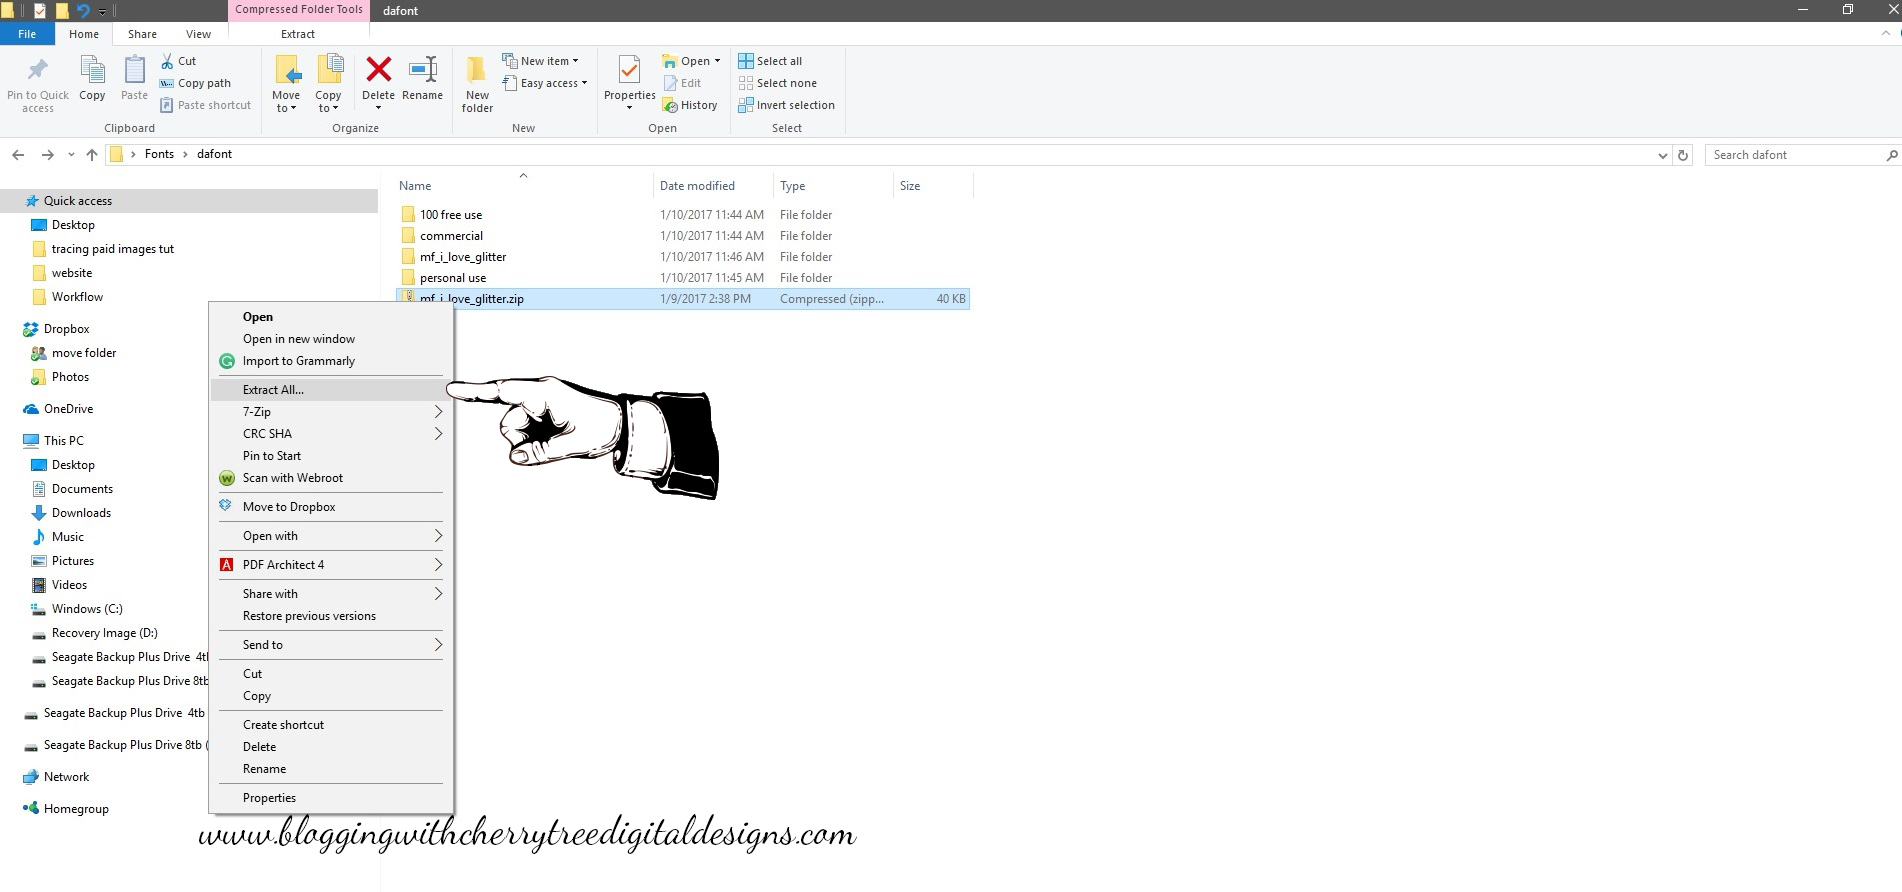
Most downloaded products will come in zipped form. This allows the designer to give you more than 1 file at a time all nice and bundled together. This would include the product you ordered, terms of use, and possibly any other documents they include in their package for you. In order to use these products, you will need to unzip or extract these items.
- Right click on the zipped file (this file will have a zipper on it) You will also see under the “Type” column it shows it as a compressed (zipped file) the file name will end in .zip
- Choose extract or unzip. This will depend on what software you have on your computer. 7 zip, winzip or just the default unzipping program.
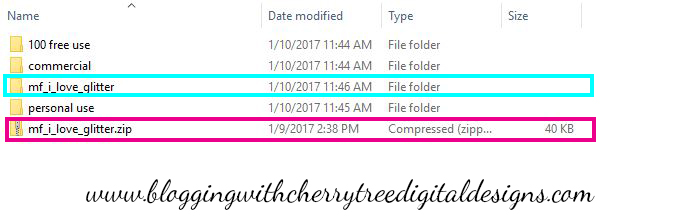
The blue rectangle shows what your file will look like once it has been unzipped or extracted. The pink box shows the file folder with the zipper on it that will need to be unzipped or extracted. Also notice the pink rectangle shows the file extension being .zip and the file type states compressed. The file ending in .zip, the file type saying compressed (zipped) and the zipper on the file folder itself are all things to look for when finding out if you need to unzip or extract the file prior to using it. When it is unzipped/extracted you will want to work with the folder without the zipper on it.
Once you have the file unzipped/extracted you will want to double click on preferably the .otf file format or .ttf if the .otf isn’t available. This will open the font in another window with the option to install. Click on install.

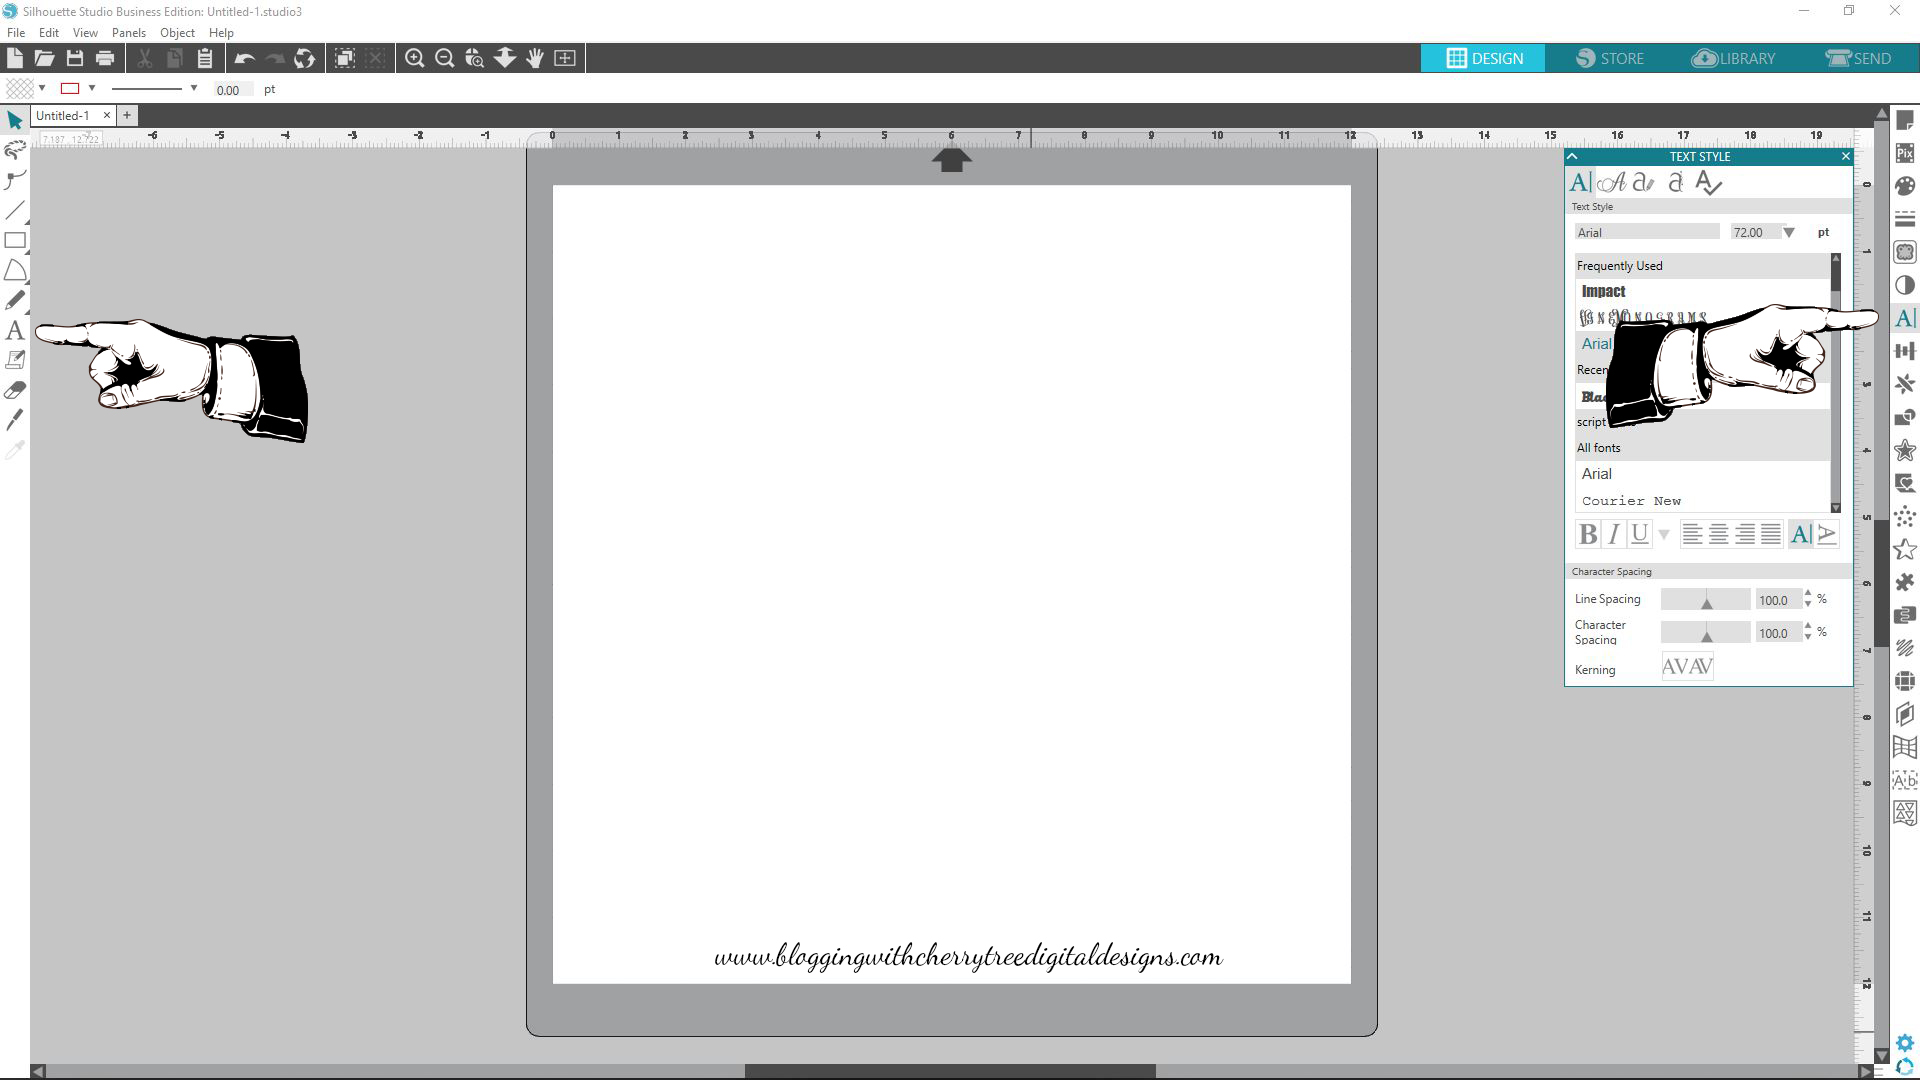
Once you have installed the font you can close out all open windows. Now you will want to open back up your silhouette software. You will want to use your text tool on the left-hand side to bring up your text features. Click on the mat to be ready to start typing. Now look to your right and you will see all of your text options. There you will find all fonts you have installed on your computer. Select mf I love Glitter and start typing!
This tutorial applies to any fonts you purchase or download from any sites. It is meant for a Windows based computer only.
Please visit these great stores for great freebies and excellent products to add to your collection and be able to produce unique items:
http://www.thehungryjpeg.com/CherryTD
http://www.fontbundles.net/rel=7EJrQy
These are my favorite companies to both receive free commercial use fonts and products as well as the great bundles they offer are amazing prices!!!
Pingback: What is a font manager and why do I need one? – Blogging With Cherry Tree Digital Designs